Hi there, it’s Birgit
here and today I have a fun, simple, and cheap technique for you that would be
great to do with kids too!
Make sure to check out the giveaway at the end of my blog!

I have tried a variety
of different felt tip markers – from very cheap to quite expensive, they all
work fine. The biggest difference is in the size of the tip. Thicker tips are
better for coloring; smaller tips are better to draw finer lines. A combination
of different sizes would be best. Other than that, there are no real
differences between the brands. You can mix and match them as you want.

Printing with felt tip
markers is very simple. You just start drawing and coloring on the Gelli Arts®
gel printing plate. The inks will not dry so you can take your time. To create
backgrounds, simple shapes like circles, work well.

If needed, you can
clean your felt tip marker by drawing some lines on a sheet of paper.

Keep adding colors and
lines around and on top of the shapes you started with.


When you’re ready,
place paper on top to pull the print.

It is also possible to
print in layers. Start with creating a background, following the previous
steps.

Then start a new
drawing, add some marks too, and print it on top of the first print.


Or you can add some
(distressed) texture by stamping into colored shapes on the gel plate.

From there just follow
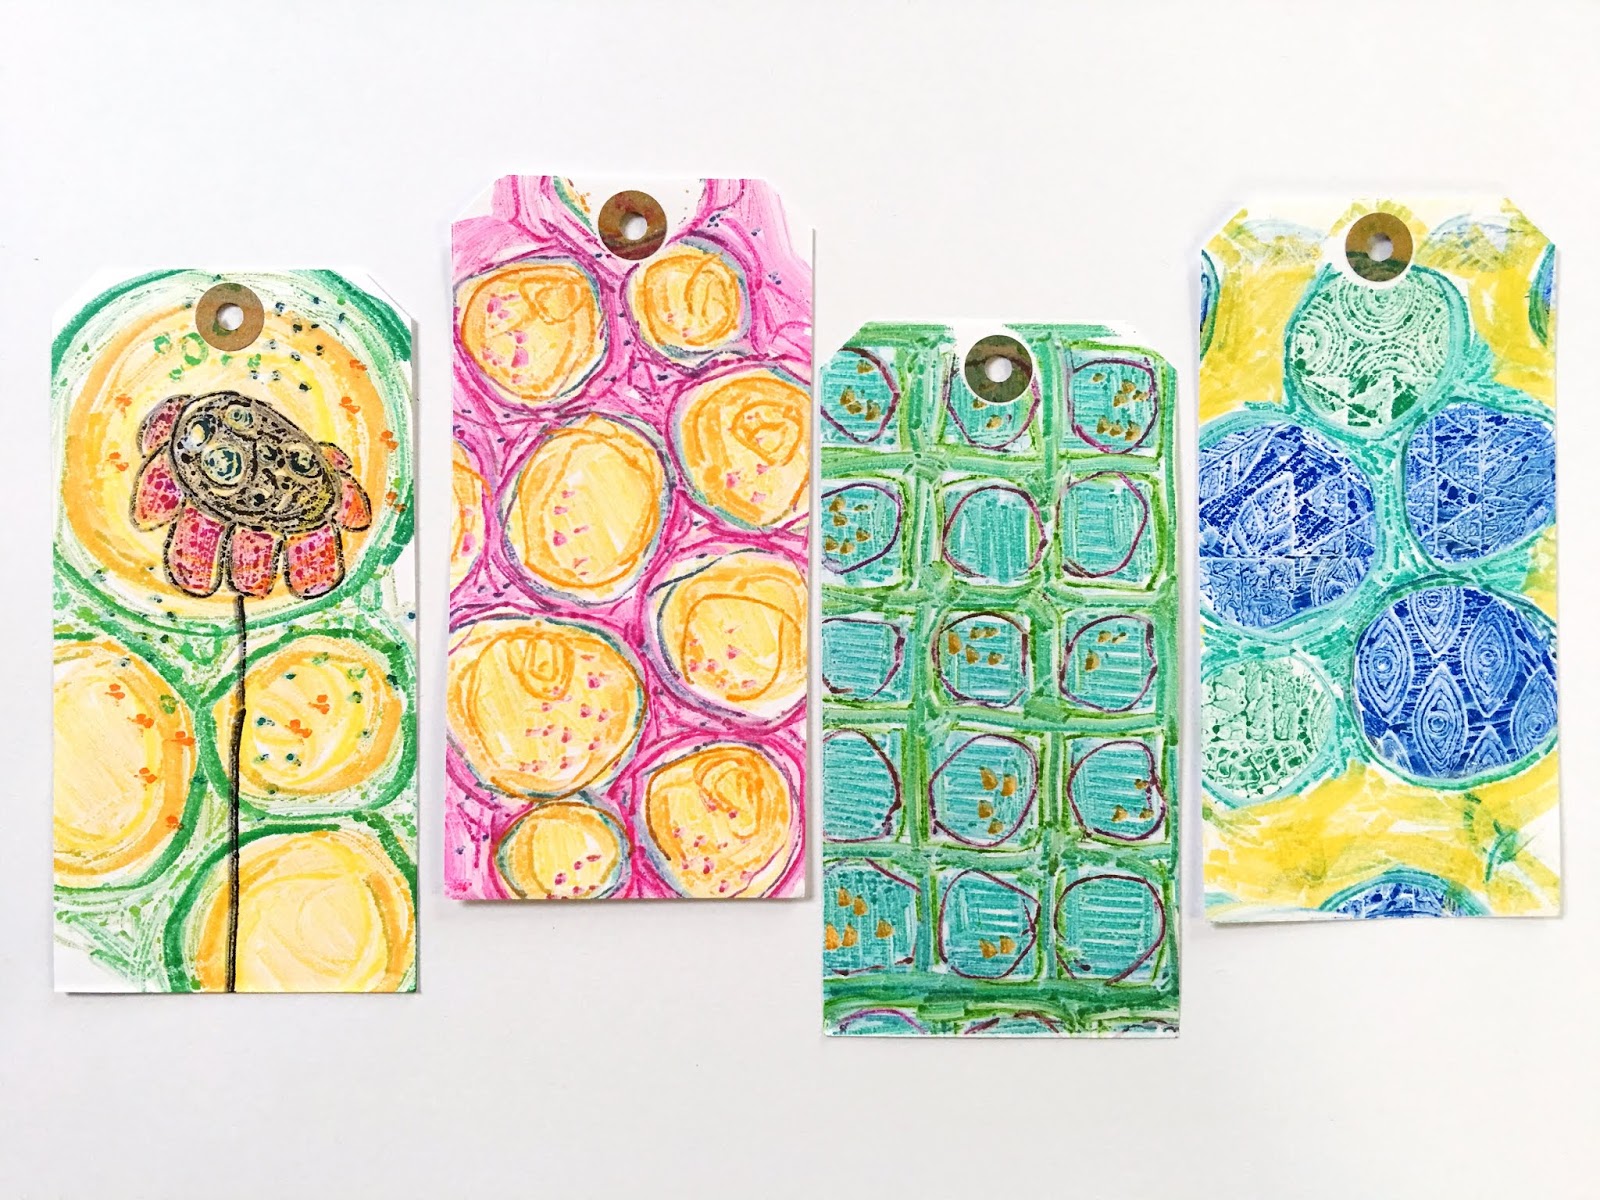
the steps like before and add more colors, line and marks.


I really like the unique
texture you get from printing with felt tips, which you would never achieve by
coloring on the paper directly.


Here are a few tips to note before you begin: Your plate needs to be dry (no wet remaining from cleaning) and not greasy when doing this technique. On newer, very clean gel plates the inks might bead together more. You can wash your gel plate with dish detergent and dry it with a paper towel and it will be ready to go. Test out different markers on the corner of your Gelli Arts® gel printing plate before using. Even if the markers dry on your plate, you will be able to remove the marks with baby wipes.
Thank you for watching and please share your prints with us on IG by tagging @gelliarts in your posts! We would love to see what you create!
Happy printing!
Birgit x

Materials:
Gelli Arts® gel
printing plate
Felt Tip markers
Paper
Stamps
Gelli Arts® Felt Tip Printing Giveaway!
© 2018 by Gelli Arts®, LLC
Philadelphia, PA All rights reserved.
Oh excellent. I love the effect with markers. I've used on envelopes before, also fabric markers on a onesie.
This tutorial is amazing! Giving more possibilities to create with Gelli Arts® gel printing plate. Gorgeous projects. Thank you so much for sharing it.
Looks like fun!
Gelli plates are so versatile – I am just starting out on my journey and am loving it! Thank you for another idea!
Best wishes
Ellie
I am excited to try this. You didn't mention Sharpies…are they compatible with this technique? Don't want to mess up my only GellinArt printing plate. 😃
Sharpies can work too – but may dry a little faster. If you wait too long the mark from a sharpie will dry and you won't be able to
pull in the print. You can wipe marks off the plates with baby wipes.
Fun. I want to do this with my granddaughter.
Looks like so much fun … I really like the 2 – or more – layers ♡
Love your blog posts!!!
Thank you Birgit for sharing yet another awesome technique to use with our gelli plate!! I just love this as it is a very easy method to use! Thank you for the chance to win!! SuzDoodles
Es una idea fabulosa! simple y divertida!
Love this technique!
Wow this looks brill
Great idea and tutorial! I pinned it so I would remember to try it! 🙂
Have to give it a try.
Wonderful giveaway
Looks like a another great way of using your gelli plate.
Thanks for a chance to win…
A wonderful technique ,I am going to have a go for sure x
This looks like so much fun! Will have to try.
This is a great technique to use with younger students! Thank you!
I am wondering if the marker ink would work as a resist if one were to brayer acrylic paint over it. Hmmm … the possibilities! Really need to get a big plate! Thanks for all the posts and inspiration.
There is no end to the fun that can be had with a gelli plate!
This is definitely a fun way to print with the kids.. less mess for sure!
Cheap vs expensive no difference but what about washable vs permanent ?
this is great, can't wait to try it out!
What a wonderful technique! This is something I can see doing together with my little boy. He loves making art! — Marissa J.
What did I do before the Gelli Plates came about? 🙂
Very cool tip. I thought you could only use paint so this opens up a whole new world of possibilities!
What a great technique!
I would love to have another one for my classroom!!
I love love love all Birgit's innovative printing ideas!
I have been looking for a technique to get more use out of my collection of markers and this certainly is it. I'm all set up to give it a whirl in the morning. Thanks Birgit, always love experimenting with my Gelli plates.
Thank you Birgit for another interesting technique. I love experimenting with the Gelli plate…such endless possibilities.
What fantastic results, thank you for sharing. In bed recovering from op at the moment but will be trying this as soon as I am up and about.
Thanks for showing me this wonderful technique! Going to try it for a birthday card!
What a cool idea! I love the circle motifs (without needing a circle stencil.
Just one more way to remain addicted to gelliprinting!!
This is great! I'm going to try it with my kids. Way less messy than paint, haha!
So many techniques with the Gelli plates. Love these video tutorial. I have tons of markers. Will definitely give this one a go.
This looks great. Easy to get out a plate and play without getting set up with paint. I'm going to try it today.
That's such a great idea and yet another way to use my Gelli Plate!
These would make nice cards for gifts and a unique way of giving love thanks for the share!!
Such a cool technique and one I can do with my granddaughter who loves to do art with me.
I love this idea! I think this would be a great method for my grands!
As always Birgit, you continue to find great techniques for the Gelli plate. Love this one. I love the way the marker just pops off the plate onto the paper. Thank you.
Goning to try it. I have a lot of markers.
Oh what a cool idea!
Hugs
H xx
so very interesting. I will have to give it a 'spin' Thanks for the demo and the idea!
I will be trying this tonight and then sharing it with the kids I work with next week. Great technique!
I’m sure this is a stupid question but do alcohol markers have felt tips? What about crayola markers, washable or permanent?
What a beautiful technique!