
Hi everyone, Mollie here. This time with quite a simple project requiring very little additional equipment. I’ve always loved making paper snowflakes, and I used these as inspiration to make paper stencils for this Gelli Arts® project. Paper stencils are a fun and easy way of creating unique images and lend themselves well to contrasting colours.

- 6 x 6 inch Gelli Arts ® gel plate
- Gelli Arts® Perfect Placement Tool (optional but incredibly useful)
- Brayer/roller
- A variety of different coloured slow drying acrylic paints (I used Golden Open)
- Several sheets of square paper (to suit the size of the gel plate)
- Larger paper to print on
- Scissors
- Pencil
First take a piece of square paper, or if rectangular, fold diagonally and cut off the remaining strip to create a square.


Fold the paper in half, then half again. Next fold this smaller square into thirds (I worked out my thirds and used a ruler to draw lines in first).
You will be left with a triangular shape. Draw a line down the centre from the top to bottom point. Now draw a symmetrical pattern down each side making sure that you leave the centre intact.
Cut out your pattern.
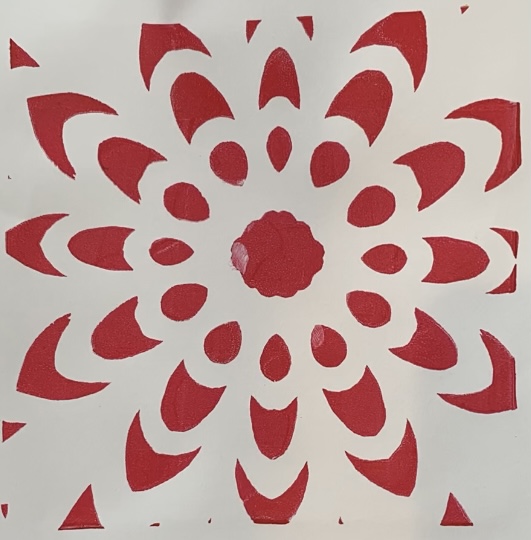
Repeat the process to create a selection of different designs. These photos show the patterns I used and the order I used them in. I printed red, then magenta, then blue and finally yellow.


Print your first colour onto white paper. For each snowflake pattern, roll your paint evenly on the gel plate using your brayer. Position the paper pattern symmetrically onto the gel plate and register the print making sure each colour is lined up neatly.
A Gelli Arts Perfect Placement Tool is incredibly useful here to ensure each layer is perfectly lined up. However, if you don’t have one, print from above, so the paper is on the table and you place the gel plate on top so you can see the previous colour to line it up. Draw an arrow in the top left corner of the back of the paper to make sure it is the same way up each time. Carefully turn the print and gel plate over to rub the paper and smooth the paint through the stencil. Be careful when removing the stencil as they are very delicate and easy to tear.


Continue the process using a different paper snowflake stencil each time and a contrasting colour. As you will see from these pictures, I had fun a lot of fun experimenting before I produced my favourite design featured (see the start of the blog). It was when I decided to print onto white rather than a coloured background that I felt the design really worked, but it’s all personal preference!


This method could be used to create some gorgeous festive images later on in the year, just by choosing the right combination of colours. Red, green, gold, purple and silver are colours that always make me think of Christmas, and I will definitely be coming back to this project with those colours in mind to make some stunning Christmas cards and gifts!
As ever I love to see what you do, so please leave a comment, or tag me on Instagram or Facebook at @artwithmollie with your design. Have fun!!

MATERIALS:
- 6 x 6″ Gelli Arts ® Gel Printing plate
- Gelli Arts® Perfect Placement Tool (optional but incredibly useful)
- Brayer/roller
- A variety of different coloured slow drying acrylic paints (I used Golden Open)
- Several sheets of square paper (to suit the size of the gel plate)
- Larger paper to print on
- Scissors
Pencil
FIND US:
FOLLOW US:
Awesome make Mollie, I love the bright colours and the way you made this.
As a kid I use to fold and cut papers in this way a lot. In the Netherlands we call them paper tablecloths because what you cut looks like a lace or crocheted tablecloth. I never had thought about making them to use on my gel plate.
Thank you so much for sharing, stay safe and have a wonderful day.